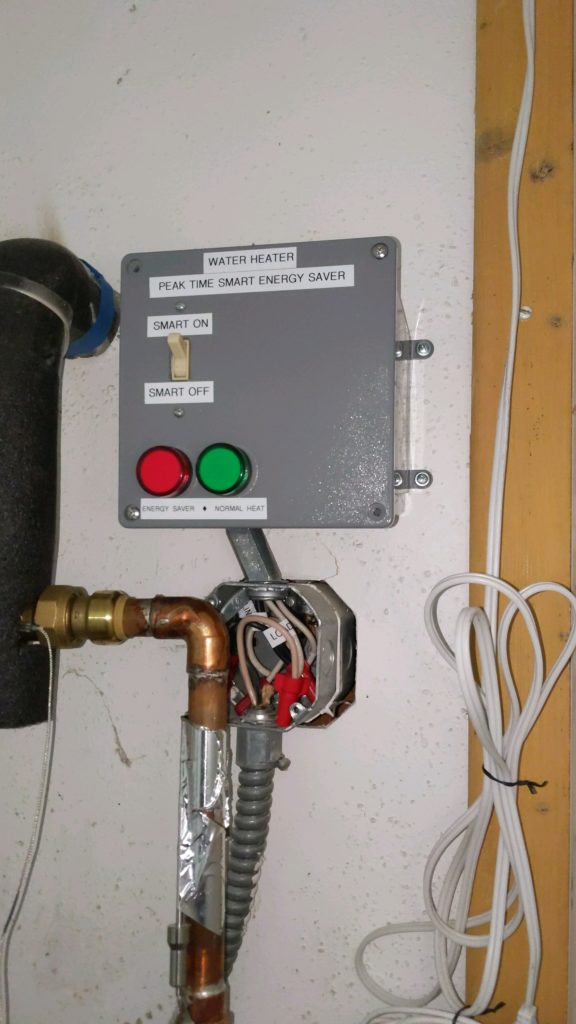
I’ve been wanting to save some electricity on my conventional electric hot water heater. Well, ok, that would be nice, but really I’ve been wanting to save some money on it. I recently found out that I could switch my power company billing to Time-of-Use, which has highest cost during certain periods of the day, and lower cost the rest of the time. I decided to build a smart control to shut off the water heater during the peak period.
I installed a thermostatic mixing valve, so I could turn up the tank temperature to ludicrous heat (150F/65C). It automatically mixes in cold water to keep the house pipes at a safe temperature (120F/50C). This gives me more total heat capacity in the tank.
To monitor everything, I bought a Nutrichef 4-probe thermometer that broadcasts on bluetooth to Home Assistant (ESPHome BLE proxy). I put the probes on the upper half of the tank, lower half of tank, output pipe before mixing valve, and output pipe after mixing valve. I connected a 3V power supply into the battery leads (and kept the two AA batteries in parallel so it even has its own UPS haha).
The hours and time of day for peak billing vary by season of the year and weekday versus weekend, so I created a template sensor in HA that calculates what the current billing category is at any given moment.
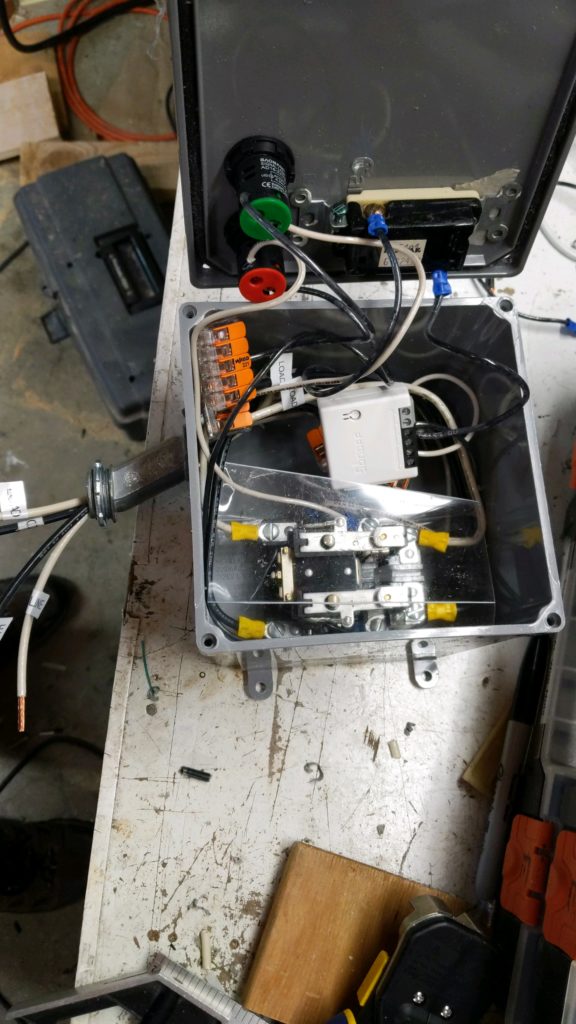
My electrical switch is a 40 Amp contactor relay, controlled by a Sonoff ZBMINI Zigbee smart switch. The contactor is normally closed, so when it is not powered, the water heater operates normally. I turn on the smart switch to pull open the contactor, which interrupts the electricity to the water heater, for peak-time bypass. (Water heater is on a 30A circuit breaker, and draws 17A when heating, so a 40A contactor has a large safety margin.)
Since I’m also monitoring the bluetooth thermometers, if the tank temp drops too low during peak time, my automation will let the water heater operate and heat back up for a limited time. This way I ensure nobody in the house runs out of hot water, but a full tank reheat will wait until peak time is over. (So far this scenario hasn’t happened yet; tank storage has been enough to get through peak time).
I don’t know yet how much money this will save me, but I spent about $100 USD to put it together, which is a lot less than a new $1500 heat pump water heater.
It is also completely silent. I have not yet heard a heat pump water heater in person, but some reports say that they are loud. My water heater is in the center of the house, so noise is a concern.
This has now been in operation for about a week, and is working great so far. I’m waiting to see how next month’s power bill turns out.
Cheap bench power supply
An adjustable power supply is pretty handy for any electronics or low-voltage electrical work. I made a simple one from a readily-available DC-DC converter board called the DP30V5A-L, rated to 30 volts and 5 amps. I got it for USD $12 from AliExpress.
Battery-powered tripod work light
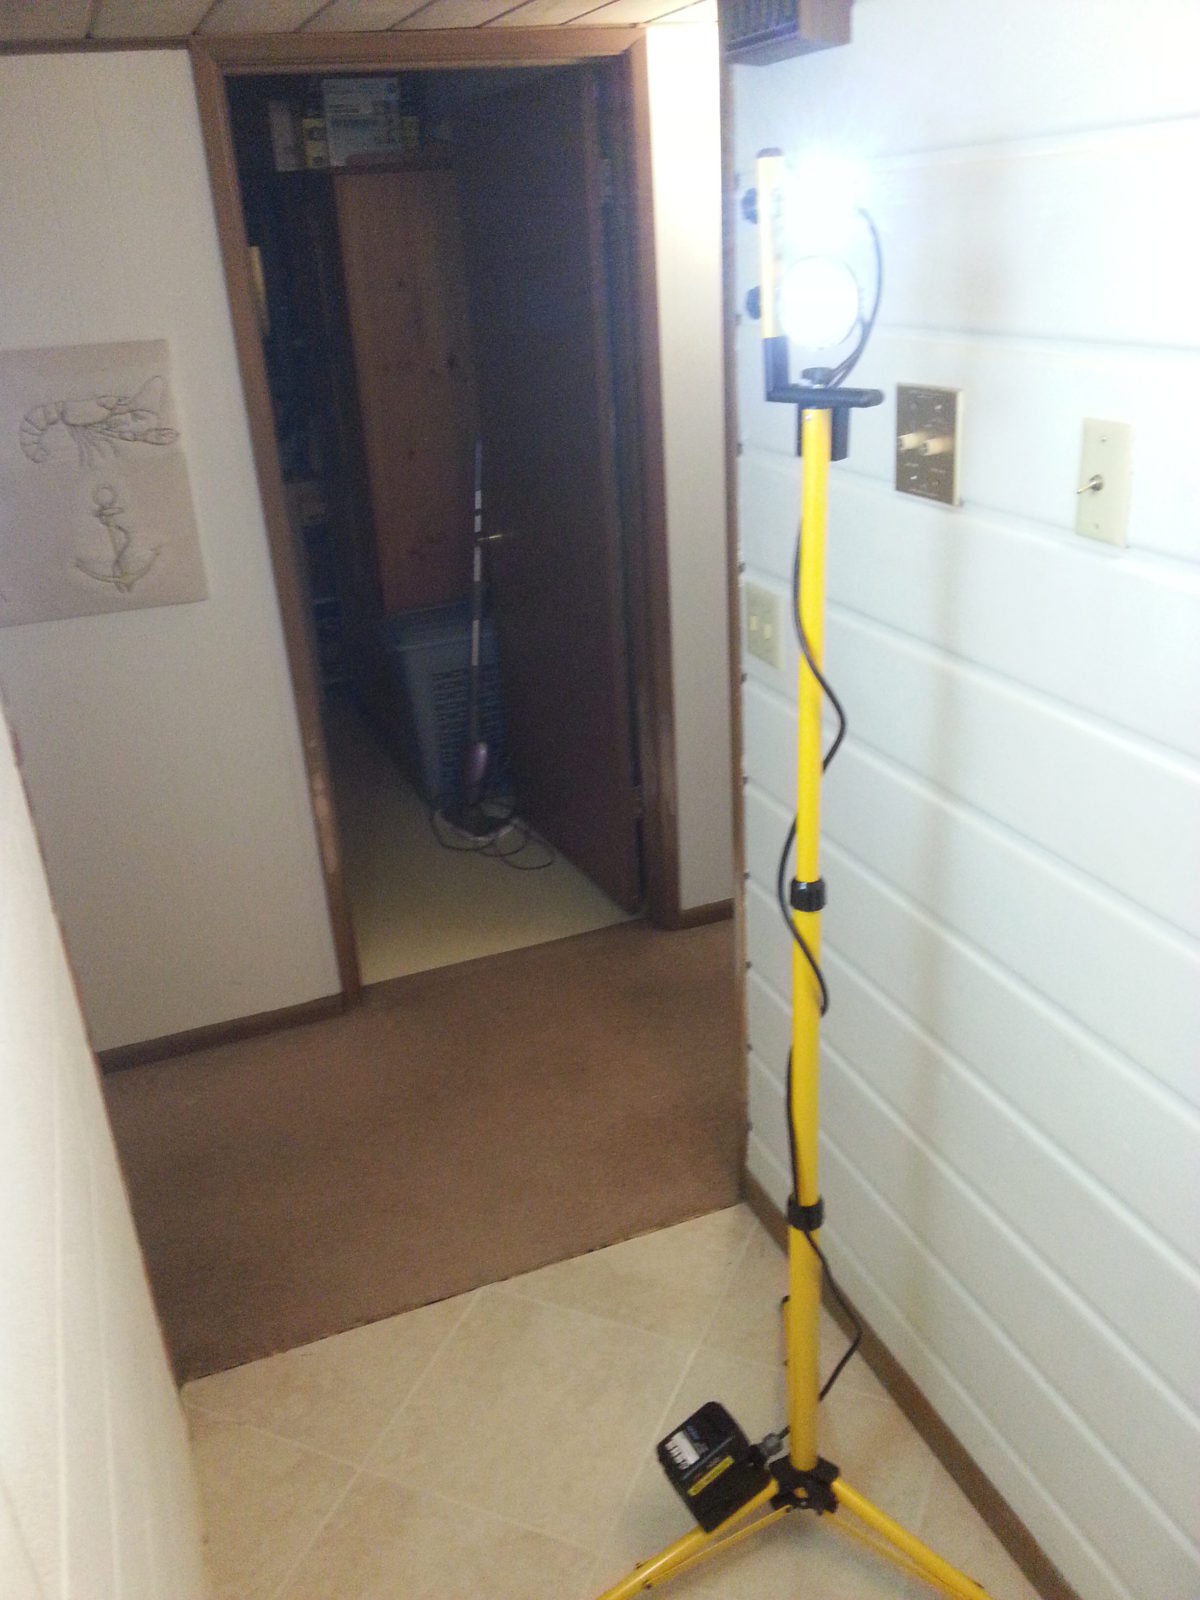
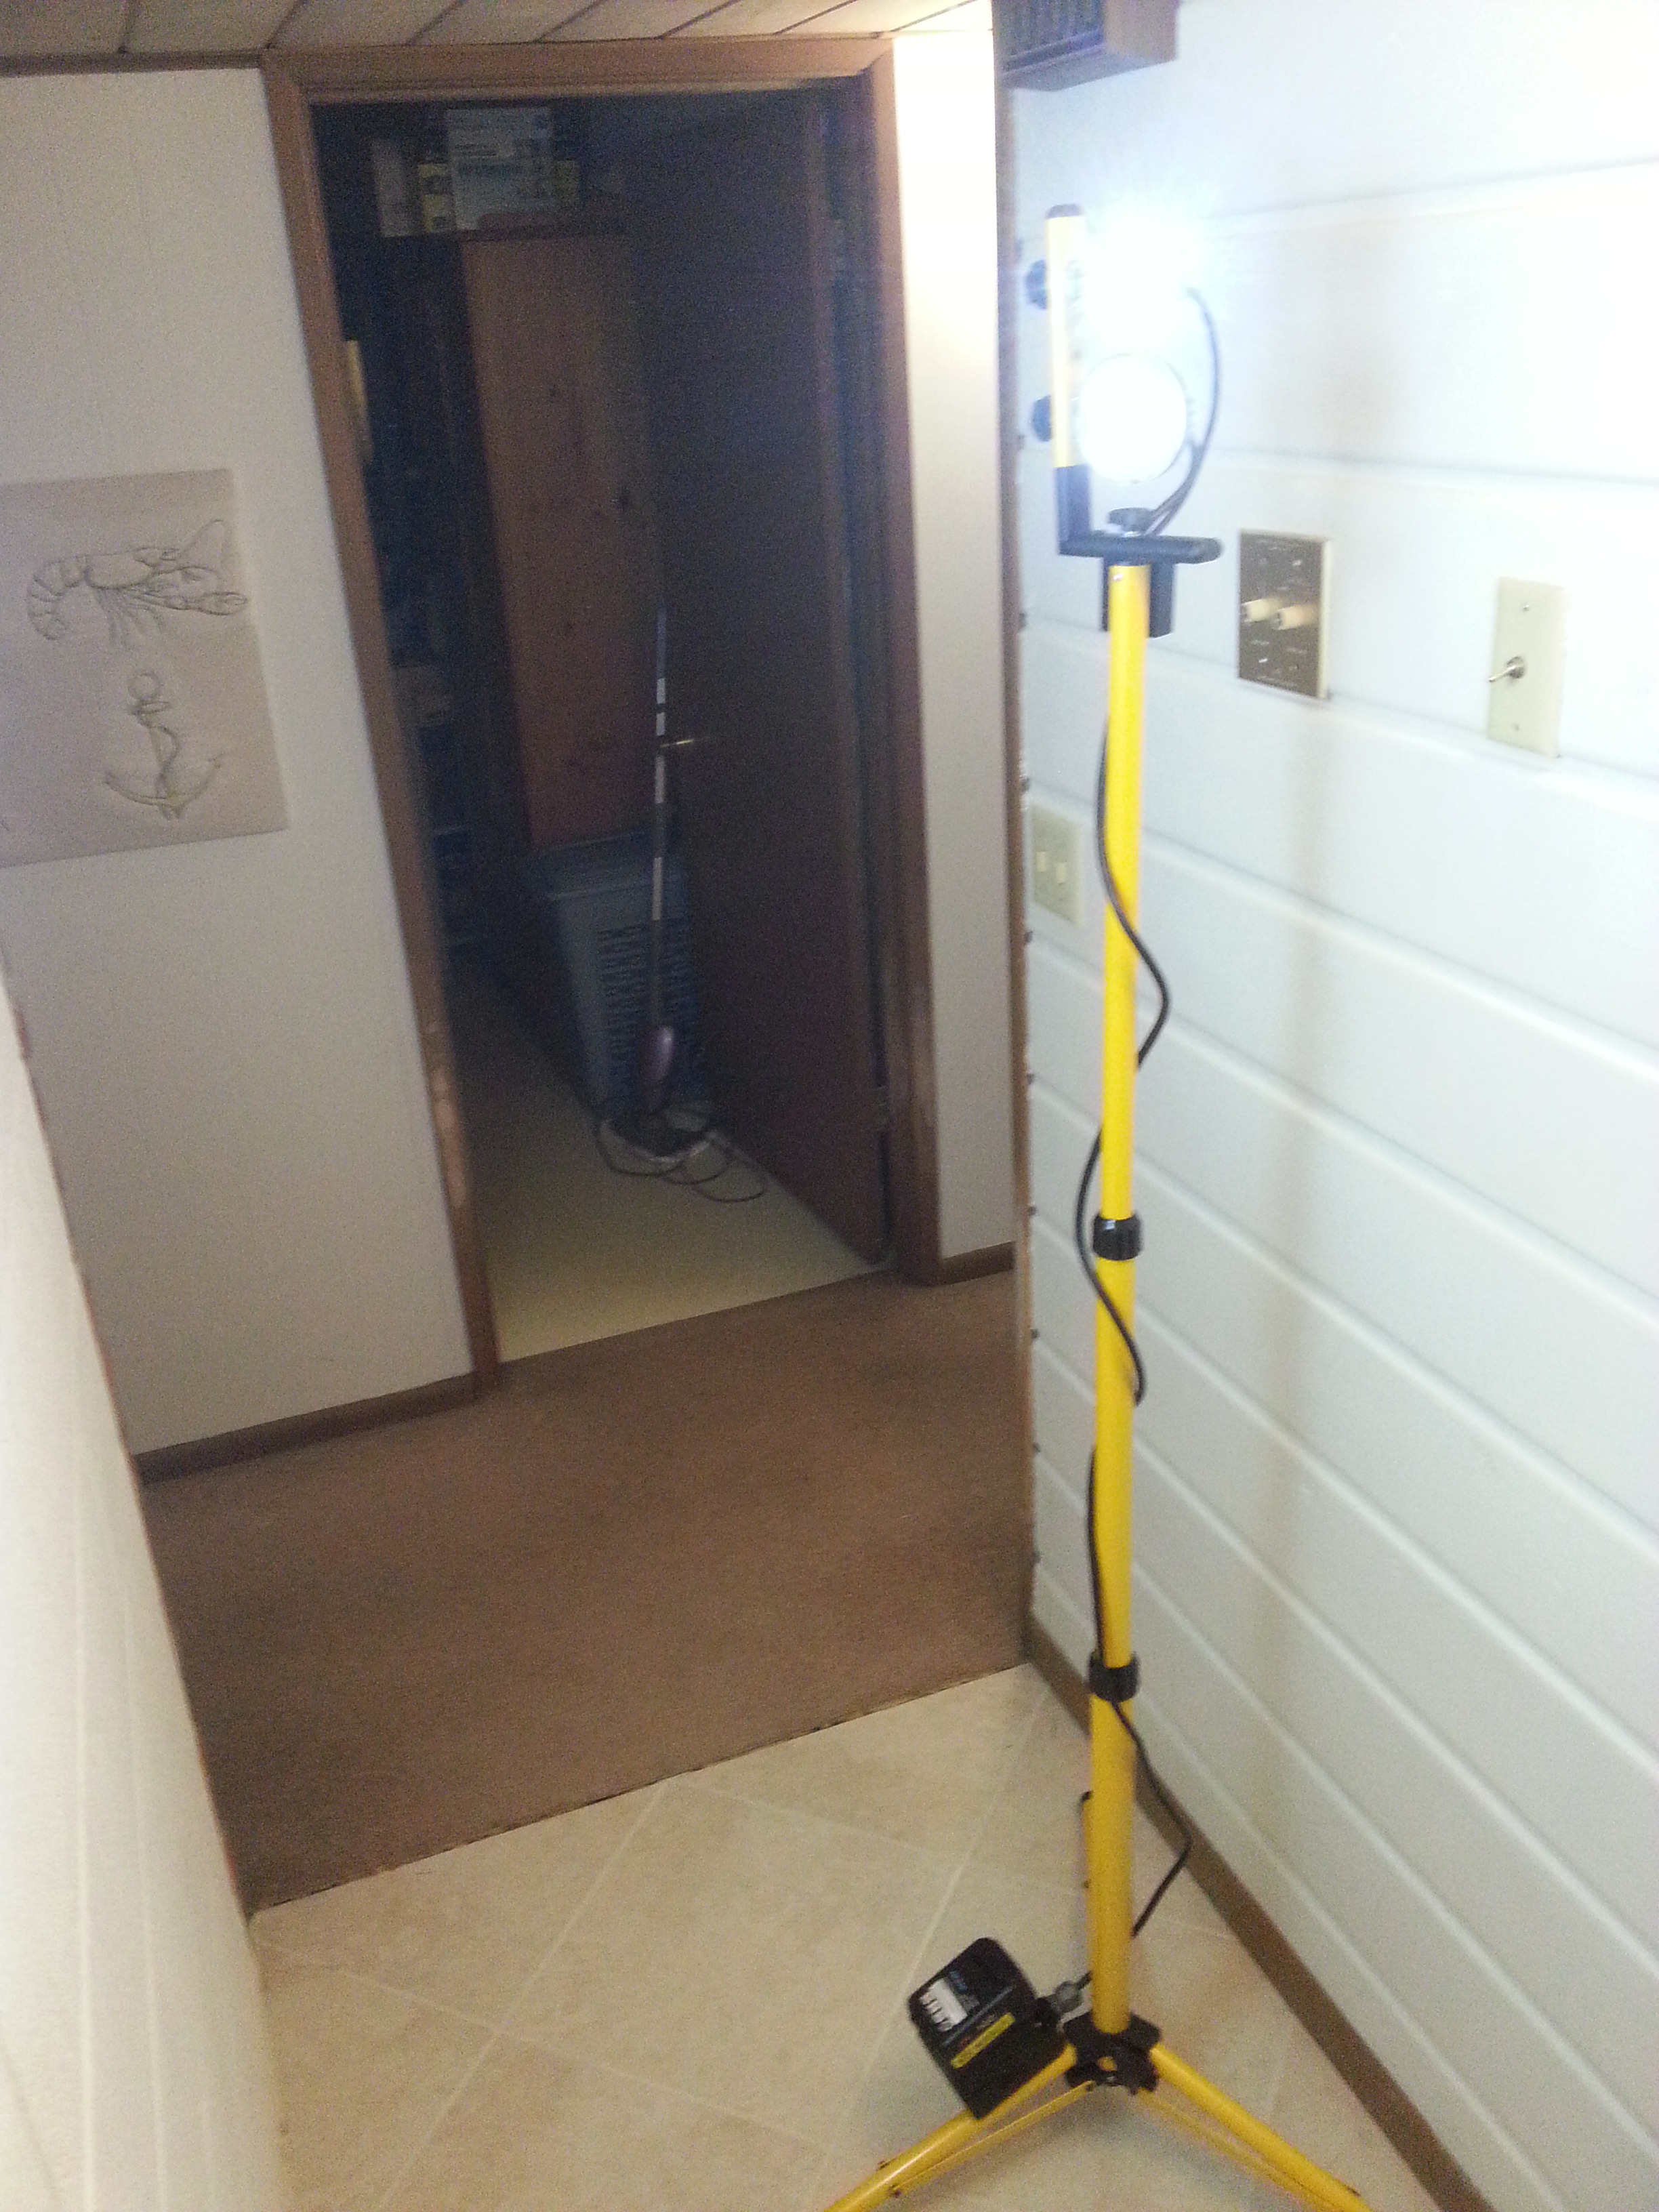
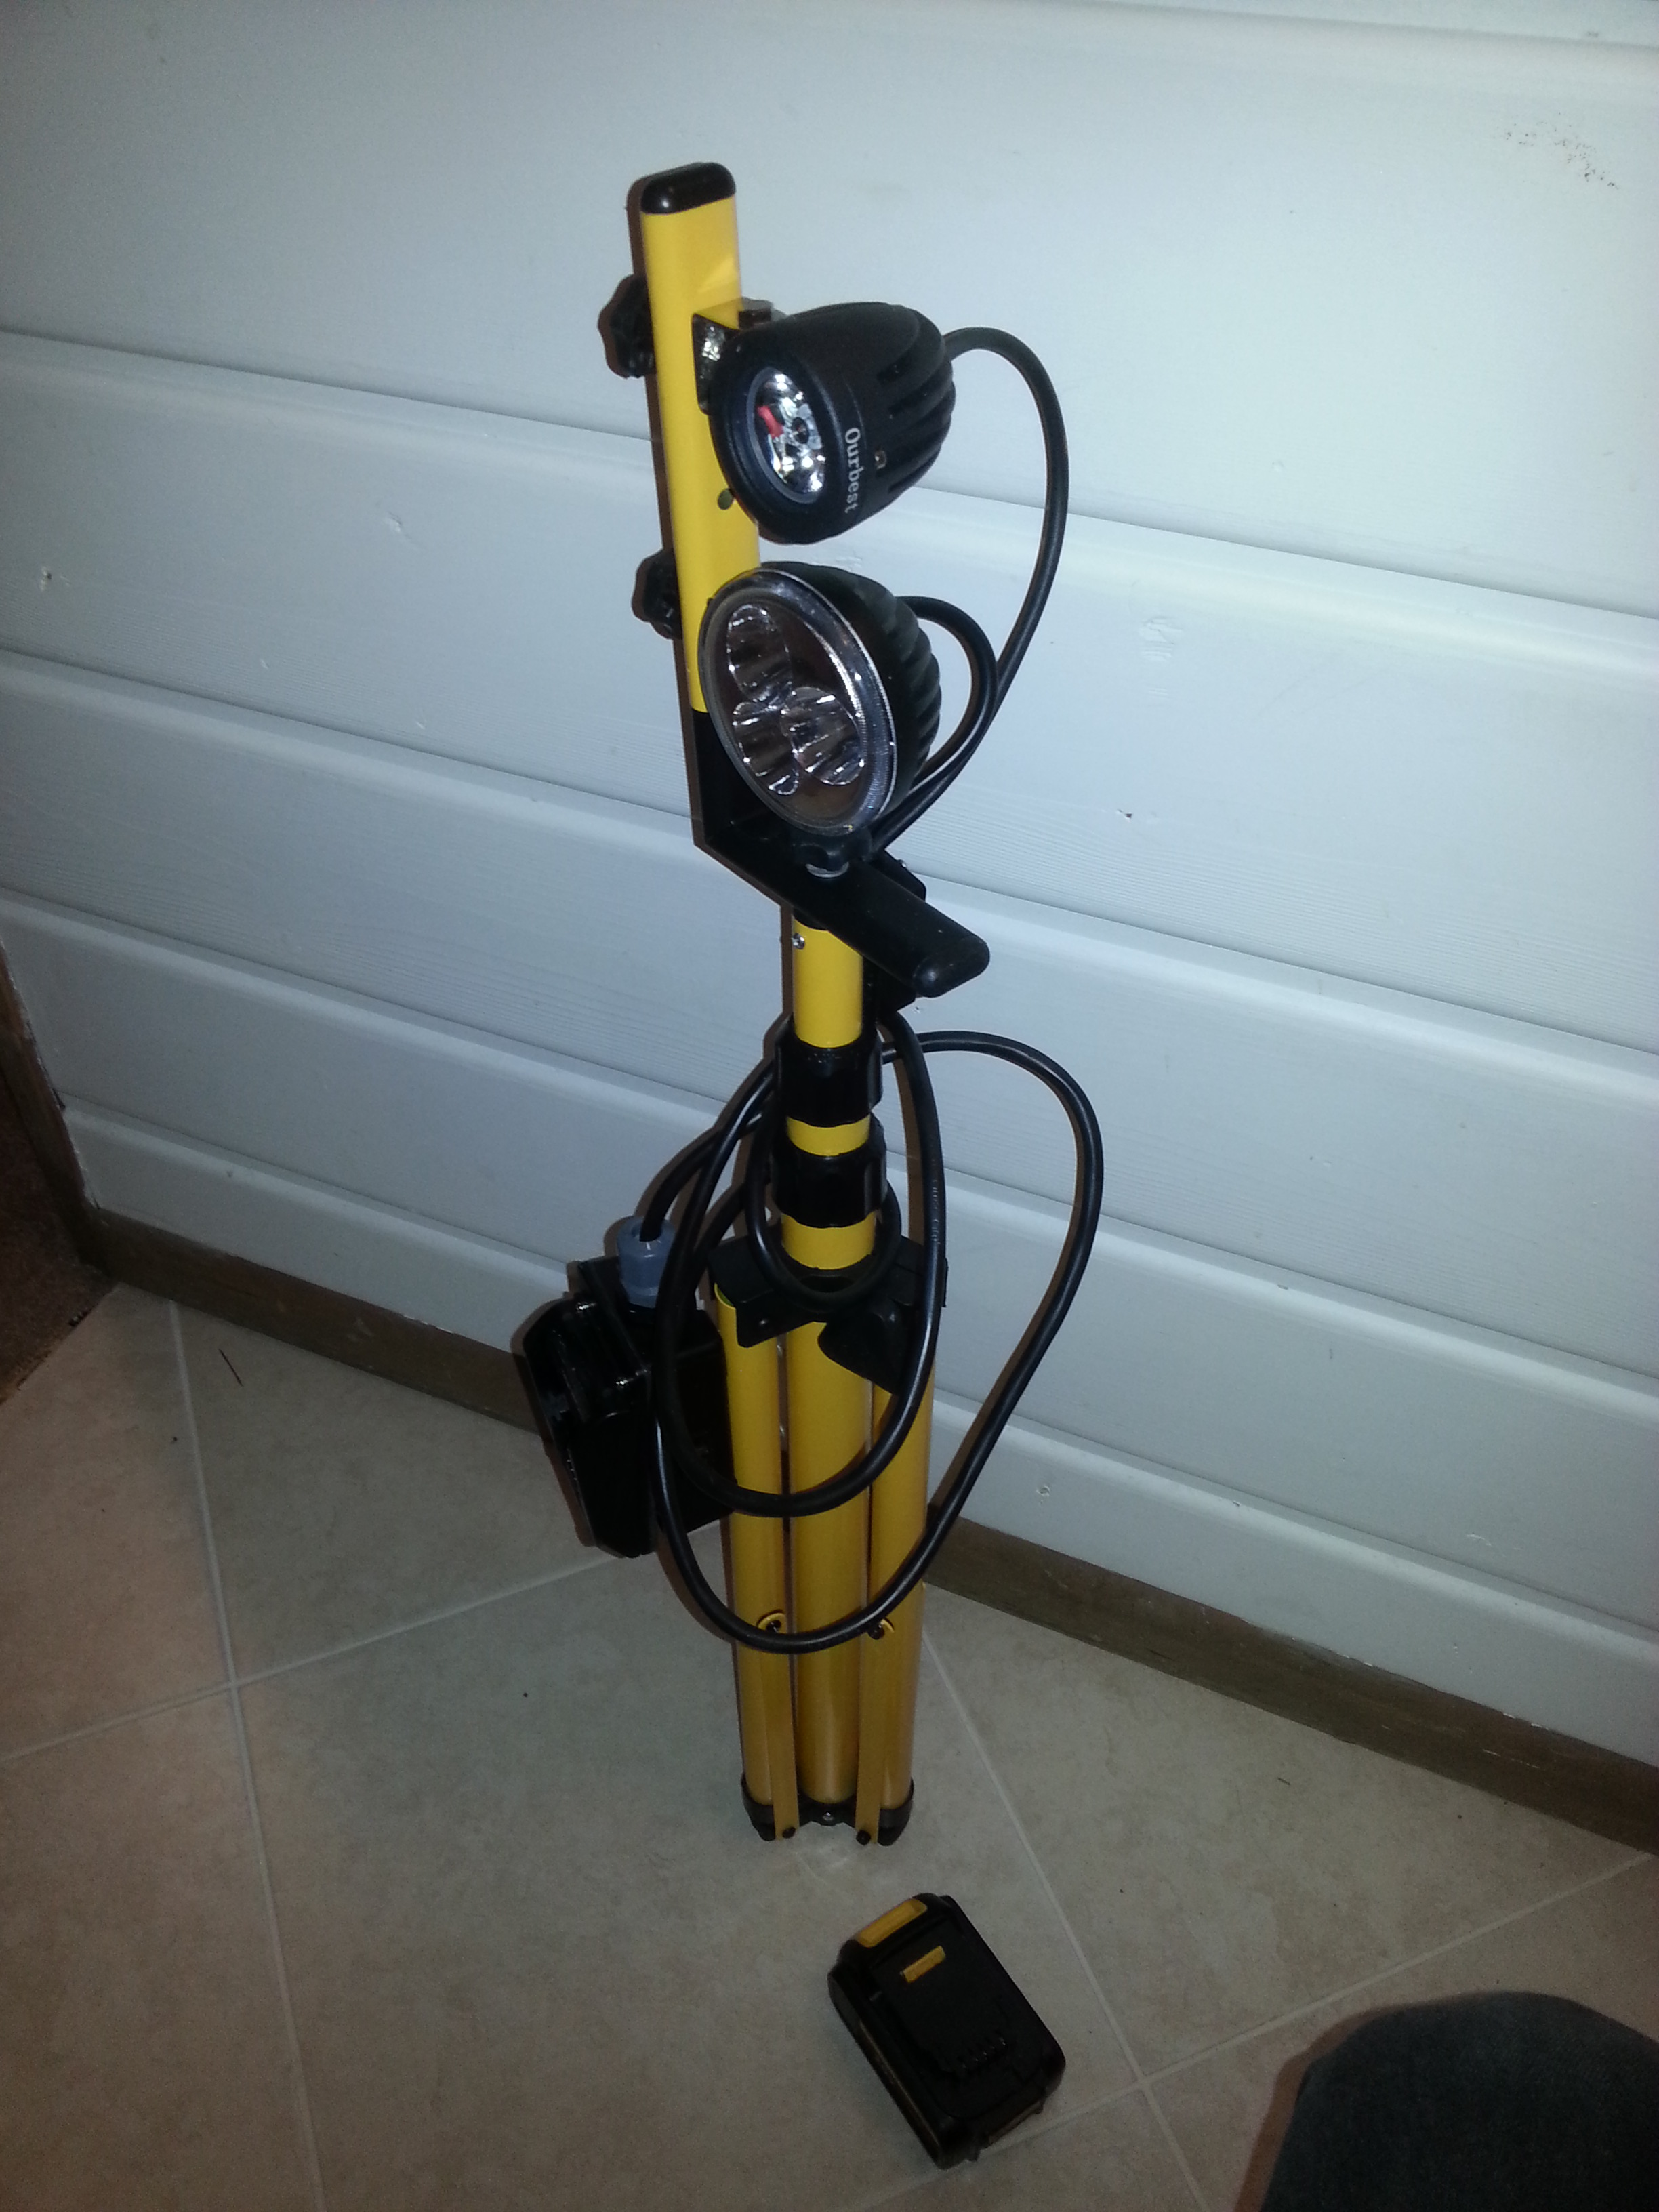
Cordless tripod worklight with spotlights powered by Dewalt 20v battery.
Power tool lithium battery brand comparison
All the cordless power tools today are using lithium battery packs, replacing the old nicad batteries used in the past.
I have a variety of brands of cordless tools, including at lot of random junk of course, and I’ve been comparing the design of the different brands of lithium battery packs, so I can adapt batteries across different brands of tools.
Ryobi | Ridgid | Dewalt | Bosch | Black&Decker, Porter-Cable, Stanley Fatmax, Craftsman 20V | Makita | Milwaukee | ||
Product line | One+ 18v | 18v Lithium | 20V Max XR | 18V Lithium | 20V Lithium | LXT | M18 | |
Personally inspected | Yes | Yes | Yes | Yes | Yes | No | No | |
Charge over-voltage protection | Pack | Pack | Charger | Charger | Charger | Charger? | ? | |
Discharge under-voltage protection | Pack | Pack | Tool | Tool | Tool | Tool? | Tool | |
Cell balancing | In pack | In pack | In charger | None | In pack | None in older LXT packs; unsure about newer | ? | |
Physical attachment | Neck | Flat | Flat | Flat | Flat | Flat | Flat | |
Other notes | Fits all Ryobi 18v tools, including older Nicad line | Fits older 18v Nicad tools | Adapter available to use on older 18v Nicad tools | Brands almost identical but not quite; can be interchanged by trimming plastic notches or tabs | ||||
Nicad batteries are simple. You just need two wires from the pack to power the tool, run the tool until it got too slow or weak, then recharge the battery. But the batteries were heavy, and voltage (and tool speed and power) drops rather quickly as the charge is depleted.
Lithium batteries provide better results in the tools, but need protection circuitry to prevent over-charging (which can start a fire) or over-discharging (which can permanently damage the battery cells).
Battery packs with built-in protection circuits inside the pack are easier to retrofit to tools originally designed for nicads. Ryobi and Ridgid have even kept the same battery connection from their older 18 volt nicad tool line into their newer lithium line of tools. Dewalt changed battery connections, but also supplies an adapter (DCA1820) to use the newer XR lithium packs with the older 18v nicad XRP line of tools. Other brands like Makita, Black&Decker, Porter-Cable provide no backwards compatibility.
Note that all of the brands advertised as 18v, 20v, or 20v Max, all operate at the same voltage and power. All are made up of 5 lithium cells in series that measure about 20v fully charged, then drop quickly to an average of 18v in use. 20v battery packs and product lines do NOT have more power than 18v packs and product lines; it is just marketing spin.
Power tool lithium battery test jig
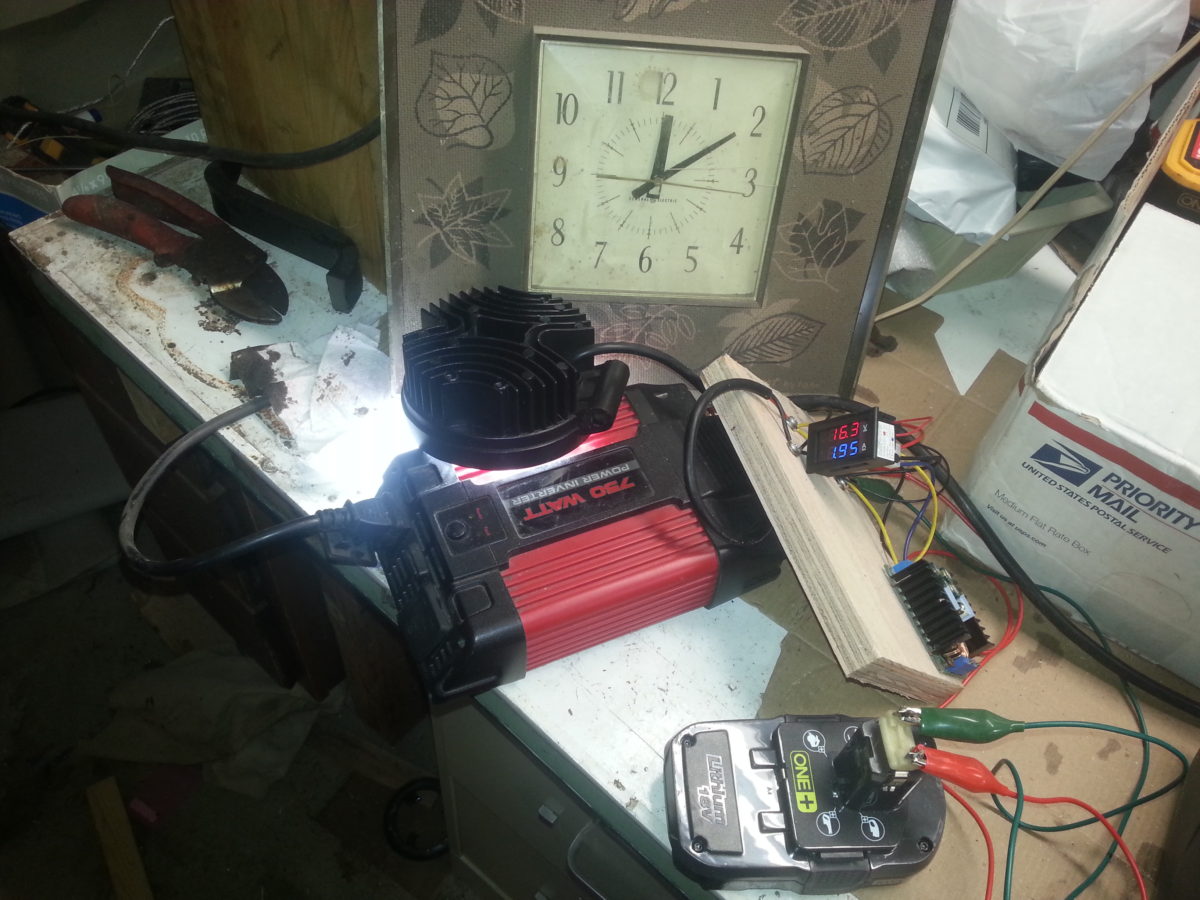
I got a pile of dead or questionable 18-volt power tool lithium battery packs on EBay for $1; just the right price for my hobby budget! They need to be load tested, to determine how much usable capacity they have. Here’s my jig for that.
The battery powers a 120-volt inverter, which runs a wall clock. I set the clock to noon (or midnight, whichever you prefer) and connect a fully-charged battery. The voltage drops as the lithium battery pack discharges, and the internal protection circuit cuts out the battery when it gets to 15v, and the clock stops there. That tells me the working time of the battery pack at 32 watts, without needing to watch it the entire time. I just come back later and see how long the clock ran. Et voila! Easy and reasonable capacity measurement.
The inverter didn’t like being powered directly by the 18v battery. It was designed to work with 12v automotive power and shuts off if the input power is over 15 volts. So I added a cheap DC-DC converter to step down the battery voltage from 18v to 13v.
The inverter and clock draw about 4 watts, and there is also a 28-watt LED lamp for extra load. A voltmeter/ammeter tells me that I’m drawing 32 watts with the lamp, inverter, and clock. It remains pretty linear; as battery voltage drops from 20v to 15v, the amperage goes from about 1.5 to 2.
I first tested my new, known-good battery packs, and found that I get about 30 minutes of run time for each rated amp-hour on the pack. For example, a 1.5ah battery ran for 44 minutes, a 2.0ah ran for 59 minutes, and a 4.0ah pack ran for 118 minutes. Rather surprisingly consistent! I got the same results with Ryobi, Dewalt, Bosch, and Ridgid packs. That makes sense since they are all using common 18650 lithium cells internally, from reputable lithium cell manufacturers that rate their cell capacities the same way.
Ryobi and Ridgid packs have internal protection circuits that cut off when voltage drops to 15v. Dewalt and Bosch lithium-powered tools don’t have protection circuits inside the battery pack; they put it in the tools and chargers. Dewalt “20V Max” batteries provide all cell connections on the pack, so I was able to use an external lithium 5S alarm board that beeped at me when it got down to 15v. Bosch 18v lithium packs don’t have internal protection, and they don’t expose the cell balancing connections to allow a common lithium alarm board either, so I just had to watch the voltmeter for when it dropped to 15v. I think Bosch has a poor design, because the packs cannot be cell balance monitored or charged at all.
Interesting result: doing the math, the run times are about 90% of the stated capacity of the battery packs. I believe there are two reasons for that. First, I suspect the watt-hour capacity of the pack as published by the manufacturer is slightly exaggerated. It assumes 18v for the entire capacity (2.0 amp-hour pack says 36 watt-hours), but the working voltage actually ranges from 18v down to 16v during battery depletion. Second, the lithium protection circuit stops the current flow before battery is fully depleted, to avoid damaging the lithium cells. Assuming the discrepancy is mostly due to the cell protection, a 10% safety margin is good.
Now it’s time to test the questionable packs and see what I can salvage!
Refrigerator went to beauty salon
Well sort of.
Here is why I broke the trim on the refrigerator. Or rather, here is what I was doing when I broke the trim on the refrigerator. Why I broke it is, well, ok, where was I?
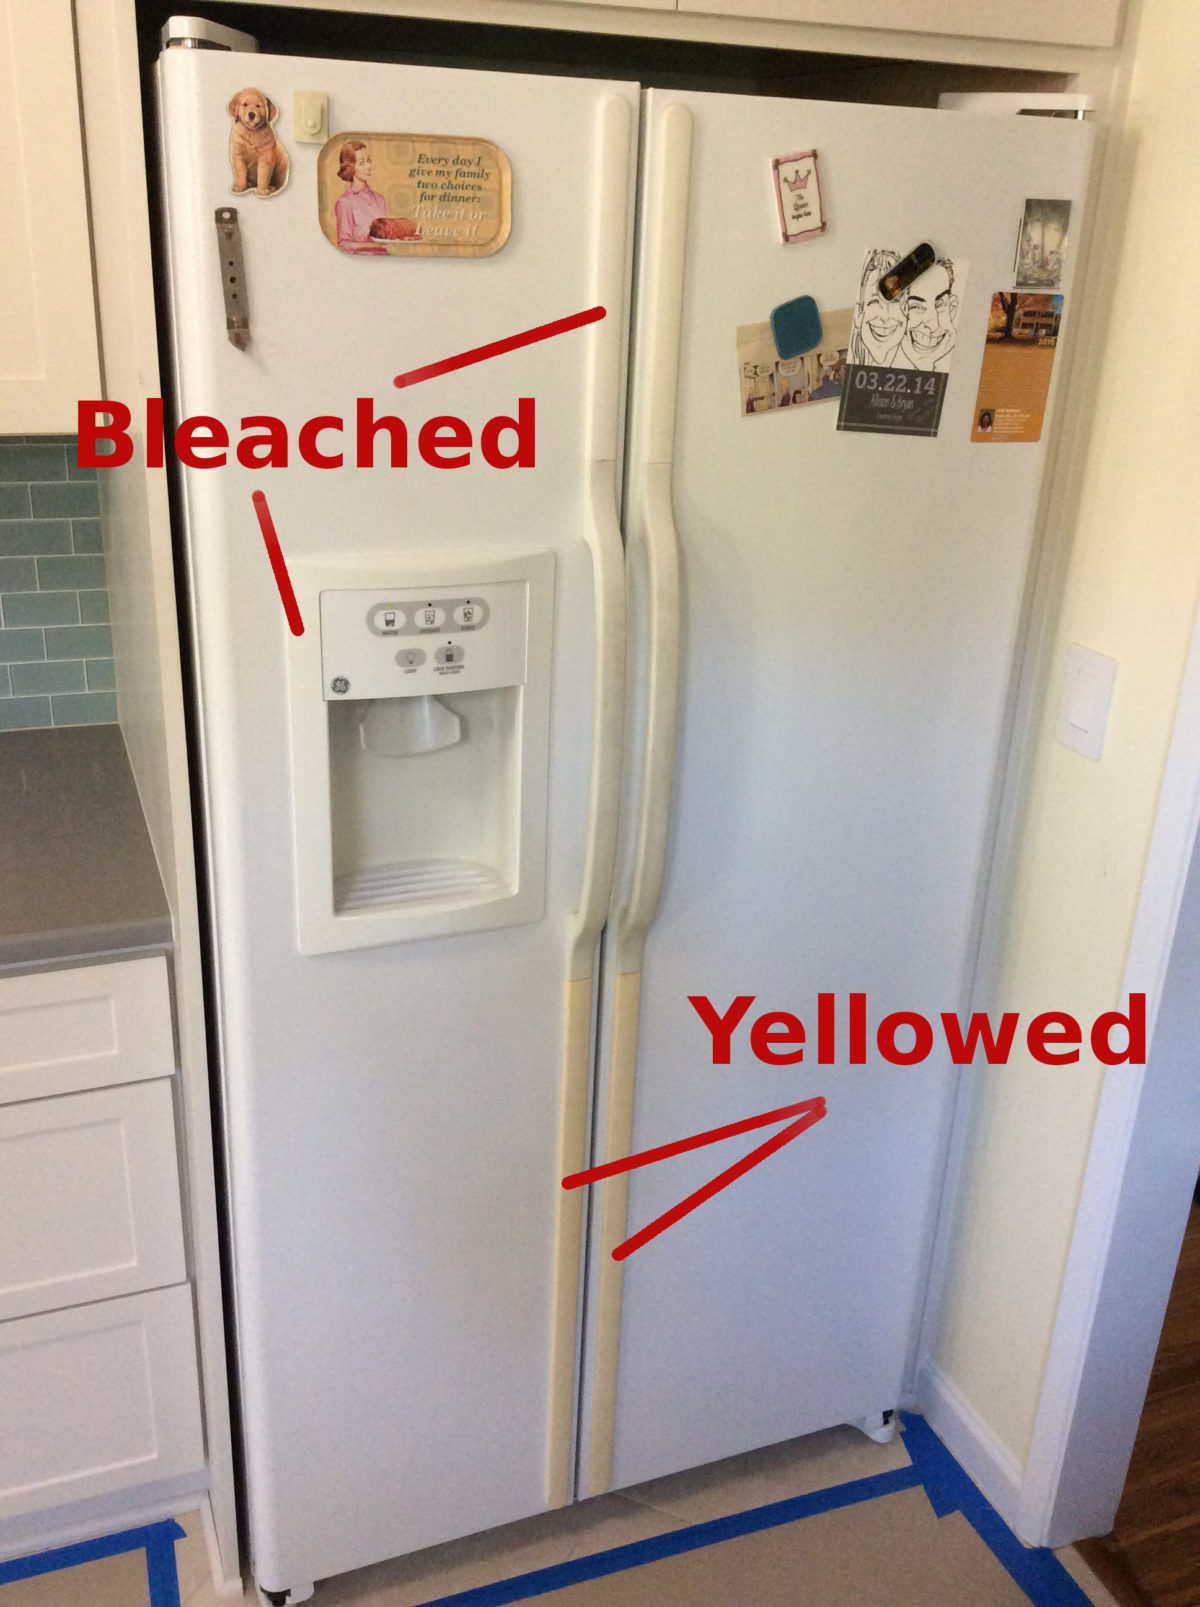
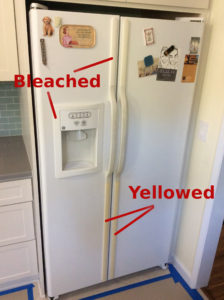
The white trim on the white fridge had yellowed over the last 10 years. I happened to have read in the past about people restoring old ABS computer cases and video game consoles with some sort of bleaching process involving a “RetroBright” glop product, or a hydrogen peroxide and who-knows-what lethal concoction you can make in your own science lab at home. (You know those nerds and their projects! Heh heh! Ahem.) Which of course I could do, but I was feeling lazy and I wanted instant gratification.
Fortunately, Dr. Youtube quickly educated me that in these modern times all I really need is some hair bleaching peroxide cream and UV light. I already had my UV light source ready at hand, powered by my fusion reactor conveniently stored at a safe distance of 93 million miles, readily available now that IT’S FINALLY FREAKIN’ AUGUST ALREADY!! ABOUT TIME WE GOT SOME SUNSHINE!! GOSH!! Sorry, a little Seasonal Affective Disorder lag in the Pacific Northwest; now back to the story.
A short trip to Sally Beauty Supply store and $3 got me a bottle of “40 volume peroxide cream 12%” and now I’m beautiful! Er, I mean, now the trim on the fridge is beautiful again.
Slop on the peroxide cream with a brush, put it in a clear plastic bag, and sit it in the sun for a few hours. Et voila! It worked. One of the pieces was ABS, and one was polypropylene. The bleaching process worked best on the ABS, but the polypropylene worked pretty well also.
One theory is that the bromine added as a flame retardant is what turns the plastic yellow. Something sure was retardant. But regardless of the cause, the bleaching worked and it looks much better now. Just a few more trim pieces to break off, I mean remove carefully, and the fridge will look good as new. And stylin’ with its new ‘do !
I just won’t use the hammer and block of wood to remove the other trim pieces like I did the first ones. Hey, Dr. Youtube showed me how to easily slide them off. Mine was just a little stuck. Where’s that bigger hammer? The doc just didn’t clarify it was for a different model. Hmmph!
Anyways, if you have any white plastic that has yellowed over time, this really did work well to restore it; give it a try!
Oh, and the broken trim pieces? Fixed with spin welding!
Plastic spin welding fixed fridge
I took a piece of plastic trim off of the refrigerator door, and the snap tabs broke right off. Dang it!
The piece was marked PP, polypropylene, which just can’t be glued. So I used spin welding to reattach them.
I cut a thin strip from a plastic lid marked PP and chucked it in the Dremel. Spun it up and worked it into the fillets. Friction melted it right in there, welding the tabs back on.
I put it back on the door and the tabs are holding on tight. Perfect!
Enable Memcache for Owncloud 8.2 on Ubuntu 14.04
Supposedly you can improve Owncloud performance by adding a memory caching module into your web server software (Apache). Or at least the Owncloud admin page says so, and complains if you don’t have one.
If you are running Owncloud 8.2 on Ubuntu 14.04, you likely have PHP version 5.5. Owncloud recommends “APCu” caching software version 4.0.6 or higher, but the version in the Ubuntu 14.04 repositories is too old (4.0.2).
This is a known issue with workaround instructions to install a newer version using dpkg. I found version 4.0.7 in the Ubuntu repositories and installed it using the instructions on the issue page. It eliminated the Owncloud admin warning.
Bronze plaque for Georgia’s parents
When Georgia’s parents passed away, the shop-night guys helped Rex cast a plaque in bronze to commemorate them.
Rewrite MEID on Galaxy S2 Epic 4G Touch
I bought another Android smart phone on EBay to use on Ting Mobile. This one was a Samsung Galaxy S2 “Epic 4G Touch” SPH-D710. All excited, I looked in the phone information screen to get the MEID serial number, and entered it into the new phone activation screen on the Ting website. Ting told me it couldn’t activate a Boost Mobile clam shell phone. What the phreak?!?!
I looked at the phone’s label in the battery compartment. The MEID was different there. Ting told me that number was good, and belonged to this model. Argh. Somebody changed the serial number programmed into the phone. As far as the radio signals go, the cell tower thought this WAS a Boost Mobile clamshell phone talking to it.
Apparently someone previously had a Boost Mobile account with a cheap phone, and wanted to use this Galaxy S2 instead without changing their account, so they programmed the Boost Mobile phone’s MEID into the S2. (Strictly speaking, this is considered a no-no by the big carriers. They feel they have the right to charge you more for service on a fancier phone, for features you don’t use. If you don’t like that, you can use the old cruddy phone. If you don’t like it, use two tin cans and some string, as fas as they care.) I don’t have a problem with someone doing this number swap for themselves, but when you later go to sell the phone you should at least put it back to its original configuration so you don’t mess up the buyer. Like me. Grumble…
Ting runs on the Sprint network, and Sprint doesn’t allow Ting to activate phones from Sprint’s subsidiaries like Boost Mobile. I could not activate the Boost Mobile MEID on Ting, so I had two choices: ship the phone back to the EBay seller, or reprogram the MEID back to a usable one. I decided to try reprogramming it.
Lots of people put new versions of the software on their Android phone, also known as “flashing a new ROM”. Many people consider this to be obscure phone magic best left to hardcore nerds, even though it is usually easy to find the information for common phone models. The ebay seller of this phone had indicated it was flashed with alternate software, and I was fine with that. I knew I would have no problem with that, since I could reflash it back to the stock Samsung/Sprint software with no trouble if needed.
However, it gets much more complex when you change settings buried deep in the phone, such as radio controls or the MEID. The phone carriers and manufacturers as a rule do not want phone owners to change these values. Independent cell phone repair shops often have the software and expertise to do this, but at the individual or hobbyist level it is rather uncommon.
Fortunately, though, it is not impossible or unavailable; just difficult because of obscurity. The knowledge is scattered among many different Internet forum postings and bits and pieces of software notes. The details and techniques are different for every phone make, model, carrier, and software version. It takes a lot of digging and persistence. You have to be tenacious. Or just plain cheap and stubborn. (You already know where I fall on that spectrum.)
Sprint (and Verizon, and a few other minor carriers) use the CDMA radio system instead of the more-common GSM. The primary tool for changing the settings in Sprint phones is “CDMA Workshop”. I couldn’t get the free demo version to work, so I had to dig around to find other software. I could have spent $600 for the paid unlocked version of CDMA Workshop, but I didn’t find that to be a good value for fixing a phone worth less than $100, cheapskate that I am.
I found two pieces of software that would talk to my phone:
I also found that there were not one, but TWO passwords required to reprogram my phone. Drat and double-drat!
The first password needed is a six-digit number, called either the SPC or MSL code. I found some documentation that said they are the same, and other docs saying they are different. The various software programs call it the SPC, but seem to work correctly using the MSL value there. OK, whatever.
The normal situation with CDMA carriers like Sprint and Verizon is that they are the only ones who know your phone’s MSL code, and will not give it out willingly to you. That’s justified if they subsidized a portion of the cost of the phone, which is the case with most phone contracts in the US. But once you’ve fully paid for it and they still won’t give it out, they’re just being greedy corporate jerks. Enlightened, customer-friendly carriers like Ting will happily give it to their customers. Unfortunately, I could not get the MSL from Ting until I activated the phone, and I couldn’t activate the phone without reprogramming it, and I couldn’t reprogram it without the MSL password. Catch-22. Dang!
Fortunately, the first program cdmaDevTerm showed me that my SPC/MSL code had been reprogrammed into the phone to “000000”. This was the only convenient side effect of the earlier owner’s reprogramming. Apparently changing the SPC/MSL code to all zeroes is a common part of making these changes, which makes sense in retrospect. cdmaDevTerm tried it as a default action and it just happened to work.
cdmaDevTerm does not support the feature of reprogramming the MEID, but DFS Tool does. That’s when I discovered the second password requirement: an additional 16-digit password. Oh no.
Fortunately, more forum browsing indicated that there is just one of these 16-digit passwords per phone model (not per individual phone like the MSL). The password might possibly change with new software versions for the phone, but still all phones of the same model and software version would have the same passwords. I eventually found 16 Digit Password Issue in 4.1.2 Update – anyone else? which said that the password for my phone with the “Jelly Bean” software version is 2012112120131219. A forum poster said it worked for them on their Epic 4G Touch with Samsung ROM version GB27, which is what I was using.
Success! With that password, I was able to reprogram the MEID in the phone back to the proper one from the phone’s label. The phone activated immediately on Ting, and has been working fine for a week now. A bit of an ordeal, but a satisfying success in the end.